
How to draw a Teapot. Life can get pretty occupied and furious in some cases, and one of the most outstanding ways of quieting down and loosening up a piece is by partaking in a decent hot cup of tea. While making some flavorful tea, the most well-known strategy is to utilize a Teapot. Tea can come in various flavors and assortments, and Teapot has a similarly noteworthy assortment in its plans and beautifications. It tends to be enjoyable to envision what your very own Teapot might resemble, and figuring out how to draw a Teapot is an incredible method for doing exactly that.
If that says something you like to procure, look no further than this instructional exercise! You can draw many more characters like Anubis drawing, coconut drawing, betta fish drawing, cobra drawing, bow and arrow drawing, blueberry drawing and many more flower drawing steps.
Teapot Drawing Step By Step
Step 1:
To get this aid on the most proficient method to draw a Teapot began, we will begin with the cover of the Teapot. You can begin this by drawing a little circle at the actual top of the Teapot. Then, at that point, you can expand two bent lines down from this circle, and whenever you have drawn that, you can draw an edge at the foundation of the top. When this top is finished, you should define two bent boundaries descending from the edge, as these will shape the beginning of the sides of the Teapot itself. It’s as simple as this step, so you can continue to stage 2 of the aide!
Step 2:
For the following piece of this Teapot drawing, we will draw the blueprint for the adjusted body of the Teapot. To begin with, draw another slim edge utilizing two bent lines associating the two lines you attracted descending from the top of the last step. When this new edge has been drawn, the following thing we will do will be to define two additional long-bended boundaries descending from the sides of the edge. These lines will nearly interface close to the base. However, a little hole will be left close to the right-hand side of the base.
Step 3:
To proceed with this aid on the most proficient method to draw a Teapot, we will draw the remainder of the foundation of the Teapot. Before you draw the base, we will add one more enhancing component to the body of the Teapot. You should define two additional bent boundaries near each other and spread them over the whole width of the focal point of the Teapot body. Then, you will be prepared to draw the remainder of the base.
To do this, define a bent boundary from one side of the base outside to the next, and afterward, draw another under this. The reference picture will show you how this should look, and when it’s done, we can move to stage 4!
Step 4:
Your Teapot drawing might look short and bold, so we will draw the handle and the spout for this step. The handle will go on the left-hand side of the Teapot, and it ought to be quite simple to draw. You should define an adjusted boundary falling off the side and draw another over it afterward. Then, you will be prepared to draw the spout at that point. It will again be drawn for certain bent lines to make the spout stretch out off the right-hand side and coming to vertically. When the handle and spout are finished, you will be prepared to improve this Teapot in the subsequent stage.
Step 5:

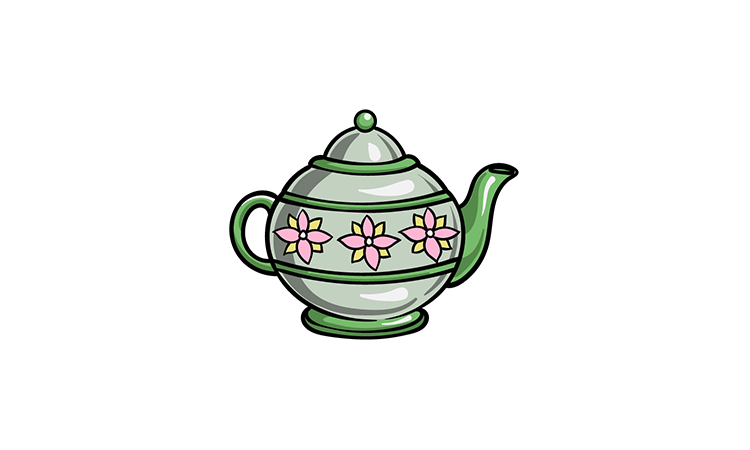
You’re prepared to add a few improvements and last subtleties in this step of our aid on the best way to draw a Teapot. In our reference picture, we went with a real flower plan for the Teapot. Each bloom on the body has a little circle at the focal point of it for certain bent lines, with a sharp focus on it for every petal. You could recreate this equivalent plan for your drawing. However, you should likewise make your example plan!
Step 6:

In this last step of your Teapot drawing, you will want to polish it for certain varieties! In our reference picture, we went for certain shades of green for the body of the Teapot. Then, at that point, for the blossom designs, we went for certain light pinks and yellows to make them pop off the green body of the Teapot. It is one more extraordinary opportunity to flaunt your innovativeness as you pick the artistry mediums and variety of conceals that best suit your creation. Make sure to have a good time getting innovative and see what works out!
Take your Teapot drawing to a higher level!
Put on some tea and partake in these tips for your Teapot sketch to make it surprisingly better! This drawing of a Teapot has a basic green variety conspire for certain flower designs. It looks perfect. However, a Teapot can come in many styles! You could give this Teapot a shiny new look with various changes and minor subtleties! Changing the variety to your #1 is an effective method for beginning. Then, you could add another example or picture to the Teapot to customize it much more. What are a few changes you could make to make this your own ideal Teapot?
Having an incredible Teapot is a certain something, yet you want a few additional accomplices to get the full impact. These could likewise be added to the draw to finish the set! The clearest decision would be a few teacups and saucers, which could be drawn in style similar to the Teapot. Then, you could add a sugar bowl or a milk container. What different frill might this Teapot use at some point utilize? Regarding appreciating tea, it’s generally expected best when getting together with a few tasty tidbits.
These could make an extraordinary expansion to this Teapot drawing! Everybody has their #1 tea snack, so you could show a portion of yours in this picture. A few works of art incorporate bread rolls, treats, and a few little cupcakes. These are only a couple, yet you could flaunt some treats you might want to appreciate with tea! You can make the ideal casual get-together. However, it’s a loss with nobody to appreciate it. Hence, adding a few people to this Teapot sketch may be enjoyable! They could be attracted to a straightforward animation style if you’re not used to drawing individuals. To make it considerably simpler and, surprisingly, more tomfoolery, you could put together these characters for individuals you know! Who, how about you need to welcome to a casual get-together?
Your Teapot Drawing is Finished!
That will finish you off this aide on the best way to draw a Teapot. We trust that planning your personal Teapot was a tomfoolery and pleasant experience for you! By following the means we have spread out for yourself and moving slowly, you will know everything you want to be familiar with, drawing a wonderful Teapot. When you have dominated this drawing, you can communicate your innovativeness by switching around the subtleties, adding some foundation components, or utilizing a few delightful tones.
It is your opportunity to flaunt what you can do, so have a great time communicating your innovativeness! You can visit our site when you’re prepared for your next drawing challenge. We have lots of advisers to appreciate, and we have a lot more on the way soon. Continue to register to ensure you will always take advantage of will take advantage of a great opportunity!
Also Read: Professional Logo Design


